
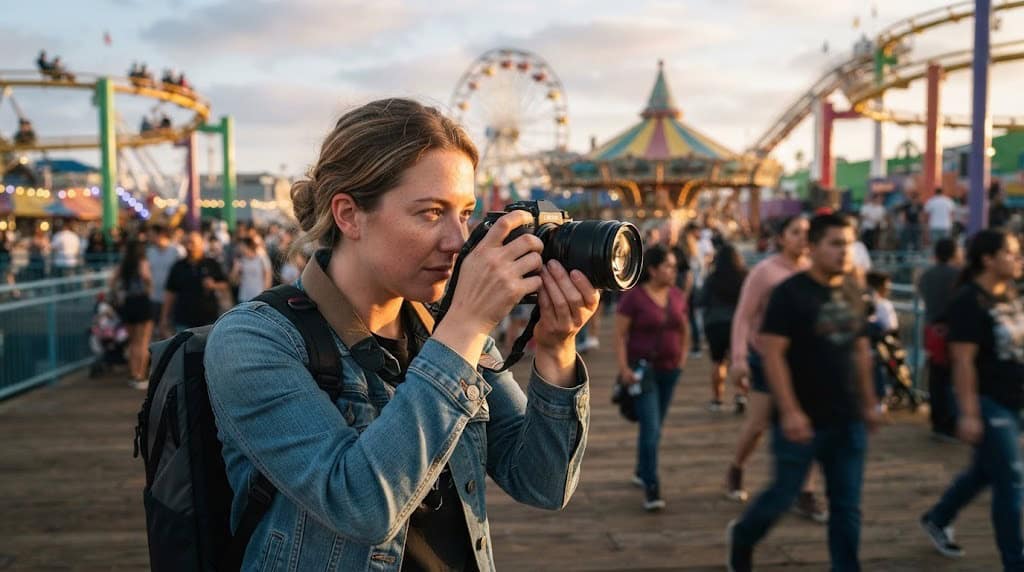
Amusement parks are full of color, movement, excitement, and unforgettable moments. From thrilling roller coasters and dazzling nighttime shows to candid family laughter and delicious treats, every corner offers an opportunity for incredible photography. Whether you’re using a professional DSLR, a mirrorless camera, or simply your smartphone, learning the right techniques can dramatically improve your amusement park photos.
In this guide, you’ll discover practical photography tips for capturing stunning images at amusement parks. We’ll cover everything from choosing the best time to shoot and selecting the right camera settings to photographing fast-moving rides, taking beautiful portraits, mastering night photography, and creating social media-worthy content.
Why Amusement Parks Are Perfect Photography Destinations
Amusement parks combine vibrant colors, creative architecture, dynamic lighting, and genuine human emotion. Unlike many photography locations, they offer an endless variety of subjects within a relatively small area.
Some of the best subjects include:
- Iconic entrance signs
- Roller coasters
- Ferris wheels
- Character meet-and-greets
- Family interactions
- Water rides
- Fireworks
- Food stands
- Colorful decorations
- Seasonal events
Every visit presents new opportunities because weather, crowds, and lighting constantly change throughout the day.
Plan Before You Arrive
Research the Park Layout
Before your trip, spend a few minutes looking at the park map. Identify:
- Signature attractions
- Scenic viewpoints
- Water features
- Parade routes
- Fireworks viewing areas
- Observation towers
Knowing where the best photo locations are will save valuable time.
Check the Weather
Weather dramatically affects your photos.
Ideal conditions include:
- Light cloud cover for soft portraits
- Sunny mornings for vibrant colors
- Golden hour for warm lighting
- Slight fog for dramatic scenes
Rain can also produce unique reflections and colorful umbrella scenes if you’re prepared.
Pack Light
You’ll likely walk for hours, so avoid carrying unnecessary gear.
A practical photography kit may include:
- Camera or smartphone
- One versatile zoom lens
- Extra battery
- Memory cards
- Lens cloth
- Portable charger
- Small tripod (where permitted)
- Microfiber towel for water rides
Comfort is just as important as equipment.
Best Time of Day for Amusement Park Photography
Lighting changes dramatically throughout the day, and each period offers unique creative opportunities.
Morning
The first hour after opening is often the best.
Advantages include:
- Smaller crowds
- Clean pathways
- Softer sunlight
- Shorter ride lines
- Fresh-looking scenery
Morning is perfect for photographing iconic landmarks without hundreds of people in the background.
Golden Hour
Golden hour occurs shortly after sunrise and before sunset.
Benefits include:
- Warm colors
- Soft shadows
- Beautiful portraits
- Dramatic landscapes
- Natural skin tones
This is one of the best times to photograph families and couples.
Blue Hour
Blue hour begins shortly after sunset.
During this time:
- Decorative lights become visible.
- The sky retains deep blue tones.
- Neon signs stand out.
- Ferris wheels glow beautifully.
This creates a magical atmosphere.
Night
Many visitors put away their cameras after dark, but nighttime offers incredible opportunities.
You can capture:
- Fireworks
- Light trails
- Illuminated rides
- Reflections
- Carnival lights
- Evening performances
Night photography often produces the most memorable amusement park images.
Camera Settings for Different Situations
General Walkaround Settings
For everyday park photography:
- Aperture: f/5.6 to f/8
- ISO: Auto (100–1600)
- Shutter speed: 1/250 second or faster
- Continuous autofocus
- Burst shooting mode
These settings work well for changing conditions.
Photographing Fast Rides
Fast-moving attractions require different settings.
Use:
- Shutter speed: 1/1000 second or faster
- Continuous autofocus
- High-speed burst mode
- Wide tracking autofocus
These settings help freeze roller coaster action.
Creating Motion Blur
Sometimes showing movement creates more exciting images.
Try:
- Shutter speed: 1/15–1/60 second
- Follow the ride smoothly while shooting
- Use image stabilization if available
This technique, known as panning, keeps the ride relatively sharp while blurring the background.
Night Photography Settings
For nighttime scenes:
- ISO: 800–3200
- Aperture: f/2.8–f/4
- Slower shutter speed when using a tripod
- Manual exposure if comfortable
Experiment with different exposures until lights appear bright without becoming overexposed.
How to Photograph Roller Coasters
Roller coasters are among the most exciting park subjects.
Find Interesting Angles
Don’t just photograph from the entrance.
Look for:
- Curves
- Loops
- Drops
- Elevated walkways
- Viewing platforms
- Nearby bridges
Changing your perspective creates more dynamic compositions.
Capture the Peak Moment
The best roller coaster photos often happen:
- At the highest point
- During steep drops
- Mid-loop
- During sharp turns
Burst mode increases your chances of capturing the perfect expression.
Include the Environment
Instead of zooming tightly on the train, include:
- Sky
- Trees
- Architecture
- Crowds
- Water features
Context makes the image feel larger and more immersive.
Photographing Water Rides
Water rides provide action and emotion.
Focus on:
- Splash moments
- Laughing faces
- Reflections
- Water droplets
- Rainbow effects in sunlight
Protect your camera using a waterproof cover or rain sleeve if you’re close to splash zones.
Taking Beautiful Portraits
Use Natural Light
Whenever possible, avoid harsh midday sun.
Instead:
- Stand in open shade
- Face subjects toward soft light
- Shoot during golden hour
This produces flattering skin tones.
Capture Genuine Emotions
Rather than asking everyone to smile, photograph:
- Laughing
- Screaming on rides
- Hugging
- Celebrating
- Eating treats
- Watching shows
Natural expressions almost always look better.
Use the Background Creatively
A colorful backdrop adds personality.
Examples include:
- Castle entrances
- Ferris wheels
- Flower gardens
- Neon signs
- Character statues
Blur the background slightly to keep attention on your subject.
Composition Tips
Good composition separates ordinary photos from memorable ones.
Rule of Thirds
Position your subject away from the center for a more balanced image.
Most cameras and smartphones offer a grid overlay to help.
Leading Lines
Use pathways, tracks, fences, or railings to guide the viewer’s eye toward the subject.
Roller coaster tracks naturally create strong leading lines.
Frame Your Subject
Use:
- Archways
- Trees
- Ride entrances
- Windows
- Decorative structures
Framing creates depth.
Look for Symmetry
Many amusement parks feature symmetrical architecture.
Perfect symmetry works well for:
- Entrance gates
- Carousel interiors
- Gardens
- Castles
- Main streets
Center your composition carefully.
Capture Small Details
Wide shots are important, but details tell the story.
Photograph:
- Ride tickets
- Popcorn
- Cotton candy
- Carousel horses
- Decorative lights
- Ride controls
- Souvenirs
- Park maps
These images work beautifully in travel albums.
Photographing Food
Amusement park food is often colorful and unique.
Tips include:
- Shoot near windows for natural light.
- Keep the background simple.
- Photograph before taking a bite.
- Include hands for storytelling.
- Experiment with overhead angles.
Bright treats make excellent social media content.
Mastering Night Photography
Night transforms amusement parks into glowing wonderlands.
Use a Tripod
If permitted, a lightweight tripod allows:
- Lower ISO
- Better image quality
- Longer exposures
- Sharper night scenes
Check park rules before bringing one.
Capture Light Trails
Slow shutter speeds can create:
- Ferris wheel circles
- Swing ride streaks
- Carousel light patterns
- Passing trains
These artistic effects emphasize movement.
Photograph Fireworks
For fireworks:
- Use a tripod.
- Shoot in manual mode.
- Use ISO 100–200.
- Aperture around f/8.
- Long exposure of 2–6 seconds.
Include landmarks beneath the fireworks for a stronger composition.
Smartphone Photography Tips
You don’t need expensive equipment to create stunning images.
Modern smartphones perform exceptionally well.
Clean Your Lens
A dirty lens reduces sharpness.
Wipe it with a microfiber cloth before shooting.
Enable HDR
HDR helps preserve:
- Bright skies
- Shadows
- Building details
It’s especially useful on sunny days.
Use Portrait Mode Carefully
Portrait mode works well for:
- Family photos
- Character portraits
- Food
- Souvenirs
Avoid using it for moving rides, where artificial background blur can produce errors.
Shoot in Burst Mode
Burst mode is excellent for:
- Roller coasters
- Water rides
- Character interactions
- Children running
Later, choose the sharpest frame.
Social Media Photography Tips
If you’re sharing your amusement park experience online, think beyond standard snapshots.
Tell a Story
Instead of posting random images, create a sequence:
- Arrival
- Entrance
- Favorite ride
- Food
- Friends
- Sunset
- Fireworks
- Night lights
This creates a more engaging visual narrative.
Mix Wide and Close-Up Photos
A balanced gallery includes:
- Scenic wide shots
- Portraits
- Detail images
- Action photos
- Food photography
- Architecture
Variety keeps viewers interested.
Keep Editing Natural
Use editing to enhance—not overpower—your images.
Adjust:
- Exposure
- Contrast
- White balance
- Highlights
- Shadows
- Sharpness
Avoid excessive filters that make colors appear unrealistic.
Common Photography Mistakes to Avoid
Even experienced photographers make mistakes in busy environments.
Watch out for:
- Crooked horizons
- Cluttered backgrounds
- Overexposed skies
- Blurry moving subjects
- Dirty camera lenses
- Overediting
- Ignoring changing light
- Standing in unsafe areas for a photo
Taking a few extra seconds to compose each shot can make a significant difference.
Safety and Park Etiquette
Great photos should never come at the expense of safety or consideration for others.
Remember to:
- Follow all park photography rules.
- Keep cameras secured on rides.
- Respect restricted areas.
- Avoid blocking pathways.
- Be mindful of other guests when using tripods or posing for photos.
- Ask permission before photographing strangers, especially children.
Responsible photography helps everyone enjoy the experience.
Essential Shot List for Your Next Visit
If you’re unsure what to photograph, use this checklist:
- Park entrance
- Tickets or wristbands
- Iconic landmark
- Roller coaster action
- Ferris wheel
- Family portrait
- Candid laughter
- Character interaction
- Favorite snack
- Water ride splash
- Sunset over the park
- Fireworks
- Night lights
- Souvenir details
- Exit sign at the end of the day
Capturing a mix of wide scenes, close-up details, and emotional moments creates a complete visual story.
Final Thoughts
Amusement parks are among the most rewarding places to practice photography because they combine excitement, creativity, architecture, and genuine emotion in one destination. By planning ahead, taking advantage of the best lighting, using the right camera settings, and experimenting with composition, you can transform ordinary vacation snapshots into memorable images you’ll treasure for years.
Whether you’re freezing the thrill of a roller coaster, capturing the glow of a Ferris wheel at night, or preserving heartfelt family moments, every photograph tells part of your adventure. Focus on the experience as much as the technical details, and you’ll return home with a collection of photos that not only look stunning but also bring back the joy and excitement of your day at the amusement park.